
畅联云平台丨RustFS Linux 手动部署实战:单机单盘生产可用(附 systemd 与多盘配置)

起因
最近在给客户的智慧消防平台做迁移,设备的底层接入由自研平台迁移至畅联云。在迁移文件存储服务时,发现原来用的 MinIO 社区版已经停止维护了,经过调研最终选择了 RustFS,至于为什么选择 RustFS 可以看我的上一篇文章“MinIO 社区版、AIStor Free、RustFS 选型对比”。在进行部署时整理了以下部署文档,方便以后自用,同时也希望能帮到其他人。
1. 部署前须知
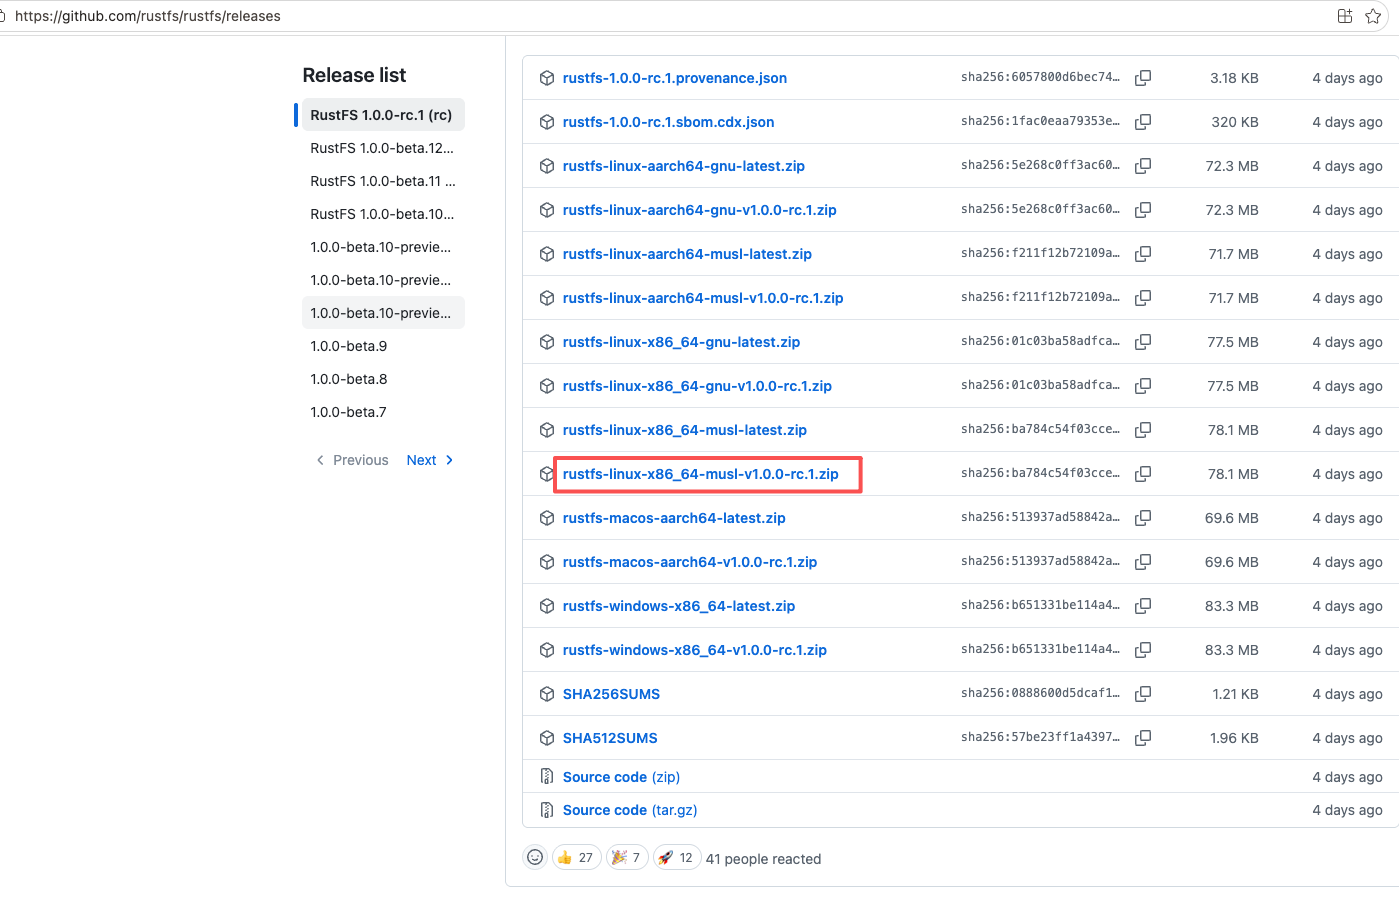
RustFS 提供两种 Linux 二进制版本,请根据系统环境选择:
- musl 静态编译包:兼容性强,不依赖系统 GLIBC 版本,推荐在 CentOS 7、银河麒麟 V10 等老系统上使用。
- gnu 版本:依赖较高版本的 GLIBC(>= 2.29),仅适合较新的系统。
下载地址:https://github.com/rustfs/rustfs/releases/download/1.0.0-rc.1/rustfs-linux-x86_64-musl-v1.0.0-rc.1.zip (进入后选择对应架构的 musl 或 gnu 版本下载)
默认端口说明:
- S3 服务端口:9000
- Web 控制台端口:9001
2. 下载二进制包
# 方式一:从 releases 页面获取最新版本号后下载(推荐)
# 先访问 https://github.com/rustfs/rustfs/releases/latest 查看最新版本号(如 v1.0.0-rc.1)
# 然后将下面的 v1.0.0-rc.1 替换为实际版本号

# x86_64 musl 静态编译(推荐,兼容性强)
wget https://github.com/rustfs/rustfs/releases/download/1.0.0-rc.1/rustfs-linux-x86_64-musl-v1.0.0-rc.1.zip

# x86_64 gnu 版本(仅限新系统)
# wget https://github.com/rustfs/rustfs/releases/download/1.0.0-rc.1/rustfs-linux-x86_64-gnu-v1.0.0-rc.1.zip
3. 创建目录与业务账号
出于安全考虑,不建议使用 root 运行 RustFS,建议创建专用业务账号:
# 创建运行用户(禁止登录)
useradd -M -s /sbin/nologin rustfs

# 数据目录(建议独立磁盘挂载到此路径)
mkdir -p /data/rustfs
mkdir -p /var/log/rustfs

# 设置目录属主
chown -R rustfs:rustfs /data/rustfs /var/log/rustfs
4. 配置环境变量
创建环境变量配置文件 /etc/default/rustfs:
RUSTFS_ACCESS_KEY="rustfsadmin"
RUSTFS_SECRET_KEY="替换成你生成的强密钥"
RUSTFS_VOLUMES="/data/rustfs"
RUSTFS_ADDRESS=":9000"
RUSTFS_CONSOLE_ADDRESS=":9001"
RUSTFS_CONSOLE_ENABLE=true
RUST_LOG="info"
RUSTFS_OBS_LOG_DIRECTORY="/var/log/rustfs/"
生产环境务必替换 ACCESS_KEY / SECRET_KEY,可使用以下命令生成强密钥:
openssl rand -hex 165. 配置 systemd 服务
创建服务文件 /etc/systemd/system/rustfs.service:
[Unit]
Description=RustFS S3 Compatible Object Storage
Documentation=https://rustfs.com/docs
After=network-online.target
Wants=network-online.target

[Service]
Type=notify
NotifyAccess=main
User=rustfs
Group=rustfs
WorkingDirectory=/usr/local
EnvironmentFile=/etc/default/rustfs
ExecStart=/usr/local/bin/rustfs server $RUSTFS_VOLUMES

# 文件句柄、进程数调优
LimitNOFILE=1048576
LimitNPROC=32768
TasksMax=infinity

Restart=always
RestartSec=10
OOMScoreAdjust=-1000
TimeoutStartSec=30
TimeoutStopSec=60

# 日志输出
StandardOutput=journal+console
StandardError=journal+console

# 安全沙箱
NoNewPrivileges=true
ProtectSystem=strict
ProtectHome=true
PrivateTmp=true
PrivateDevices=true

[Install]
WantedBy=multi-user.target
6. 启动服务
systemctl daemon-reload
systemctl enable rustfs
systemctl start rustfs

# 查看运行状态
systemctl status rustfs

# 实时查看日志
journalctl -u rustfs -f
7. 防火墙放行端口
firewall-cmd --add-port=9000/tcp --permanent
firewall-cmd --add-port=9001/tcp --permanent
firewall-cmd --reload
访问 Web 控制台:http://服务器IP:9001,使用上面配置的 ACCESS_KEY / SECRET_KEY 登录。
8. 手动临时启动(调试用)
以下方式仅用于调试,不建议在生产环境使用:
/usr/local/bin/rustfs server /data/rustfs \
  --address ":9000" \
  --console-address ":9001"
9. 单机多盘配置示例
修改 /etc/default/rustfs,多个磁盘路径以空格分隔:
RUSTFS_VOLUMES="/data/disk1/rustfs /data/disk2/rustfs /data/disk3/rustfs /data/disk4/rustfs"10. 常见问题
GLIBC_2.29 not found
下载 musl 静态版本二进制,gnu 版本不支持老系统。
端口占用
修改 RUSTFS_ADDRESS、RUSTFS_CONSOLE_ADDRESS 更换端口。
权限报错
确认目录所有者为 rustfs:rustfs。
升级
直接覆盖 /usr/local/bin/rustfs 二进制,然后执行 systemctl restart rustfs。
11. 可选:rc 命令行客户端
rc 是 RustFS 官方 CLI 工具,兼容 S3 操作,可在 release 页面下载对应架构的 rc 二进制。
集群多节点部署需要配置 RUSTFS_VOLUMES 写各节点 HTTP 地址,需要纠删码 EC 模式,和单机模式配置不一样。